
Pencil Nail Art Tutorial
Fancy nails are all the rage these days, and what better way to stay on-trend than with super cute pencil nails? Just follow the steps below! Disclaimer: This is my first attempt at anything crazier than making each nail a different color, so bear with me if my results are a little on the messy side!
Six Steps to Pencil Nail Art
Step 1: Gather your materials

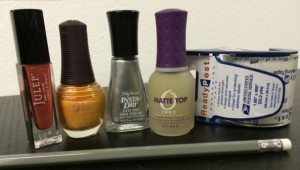
You will need tape (I only had packing tape, but scotch tape will do), a pencil, and nail polish. From left to right, I used: Nan by Julep, Treasure by SPAritual, Silver Sweep by Sally Hansen, and Orly matte finish topcoat. I also cheated and used white (Whirlwind White by Sally Hansen) underneath the yellow because it was super light. Don’t use a base coat, because the tape will strip it off.
Step 2: Tape your nails
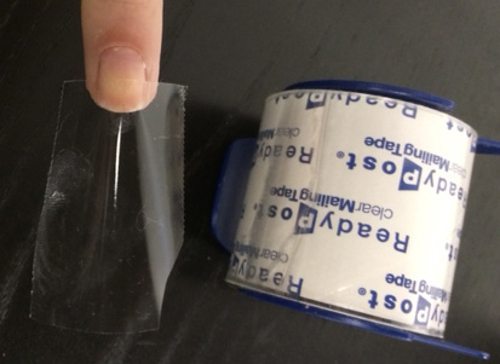
Put strips of tape over your nails, covering a little less than half your nail with tape.
Step 3: Paint on the yellow

It’s okay to be messy, the tape will protect the rest of your nails. Leave the tape on until the polish is a little bit dry, but still soft and sticky.
Step 4: Remove the tape and push back the polish

Carefully pull off the tape. Then, using the wood side of the pencil, push back the stray paint (which should still be a little soft) to create a ridge in as straight a line as possible across your nail. It’s okay if it doesn’t look perfect – this part will be covered, but the ridge will create a textured line under the silver polish that mimics the texture of the silver band on a pencil. Wait for the polish to dry completely before moving onto step 5.
Step 5: Paint on the red

Using the ridge as a guide, paint on the red color. Once it’s dry, paint on the matte finish. It’s hard to tell in the pictures thanks to the awful lighting in my room, but I promise it makes a big difference in making the eraser part of the nail look more eraser-like.
Step 6: Paint on the silver

Make sure you get all of the excess polish off the brush before each nail, because this last step is tricky. Paint on a stripe of silver polish in one smooth, horizontal stroke across each nail. Let them dry fully, and there you have it – pretty pencil nails!
Planning to give it a try yourself? Share your tips, tricks, and results in the comments!








Those look great! I kept seeing them but never gave them a go. A nice tip is to take a q-tip with some Vaseline to your cuticles before paint them. It’s helpful in cleaning up excess polish from the cuticles.